
Disclaimer: This website uses affiliate links, meaning: at no additional cost to you, I earn a small commission if you click-through and make a purchase. As an Amazon Associate I earn from qualifying purchases. I only feature products that I believe in and use myself. Your support means the world to me and allows me to host this website and create videos on YouTube. Thank you!
1. BINOCULARS
Throwing a pair of binoculars into your kit bag when heading out into nature will make spotting wildlife that much easier..
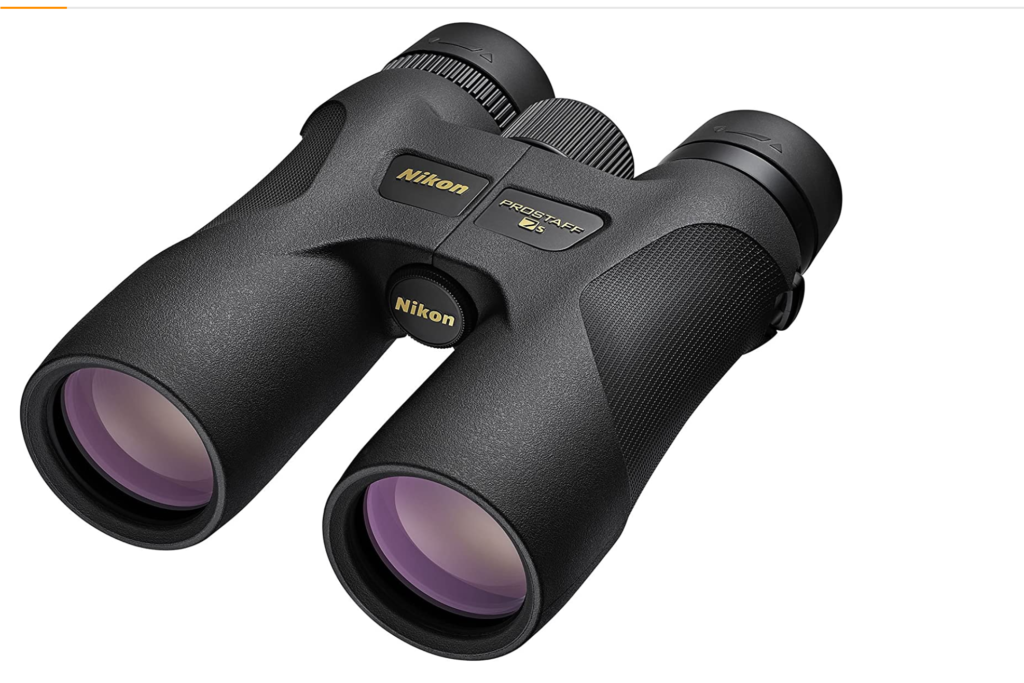
Depending on the telephoto lens you have attached to your camera, binoculars such as these Nikon 8×42’s will often be more powerful for sighting wildlife, especially small birds, and so much lighter to hold and scan your surroundings with.
Being able to spot birds and other wildlife from a greater distance means you also give yourself the chance of spotting the animal before it spots you and thereby gives you the time you need to work out how best to approach it to get closer. You can better observe its movement and judge direction to be able to position yourself ahead of it to get your shot.
Ergonomically speaking, using binoculars to scan a treeline instead of your heavy telephoto lens makes for a much less tiring and much more stable experience, not to mention, a lot less fatiguing for your eyes.
I’ve owned my Nikon Monarchs 10×42’s for over 10 years and I believe this model has now morphed into this one… Nikon Prostaff 10×42 Binocular. I find them plenty bright enough, and plenty powerful enough for my purposes. The adjustable eye-cups make them comfortable to hold up to my eyes for any length of time and the waterproof rubberized outer make them both comfortable to hold in hand as well as offering a lot of shock protection, and quite importantly they are reasonably priced for a pair of bins that are going to get fairly well abused out in the field round the neck of this wildlife photographer.!
A note on magnification:
For me personally I find the 10×42’s a lot easier to use though the magnification is obviously not as great as in the 10×50’s.
Couple of reasons for this.. firstly a wider field of view means I can scan a wider area and secondly the more powerful 10×50’s have on occasion made me a little dizzy/motion sick, especially if combined with scanning from a moving vehicle or boat.
2. tripod
Stability is key when shooting with long telephoto lenses, especially if you are on a heavy primes and adding teleconverters .
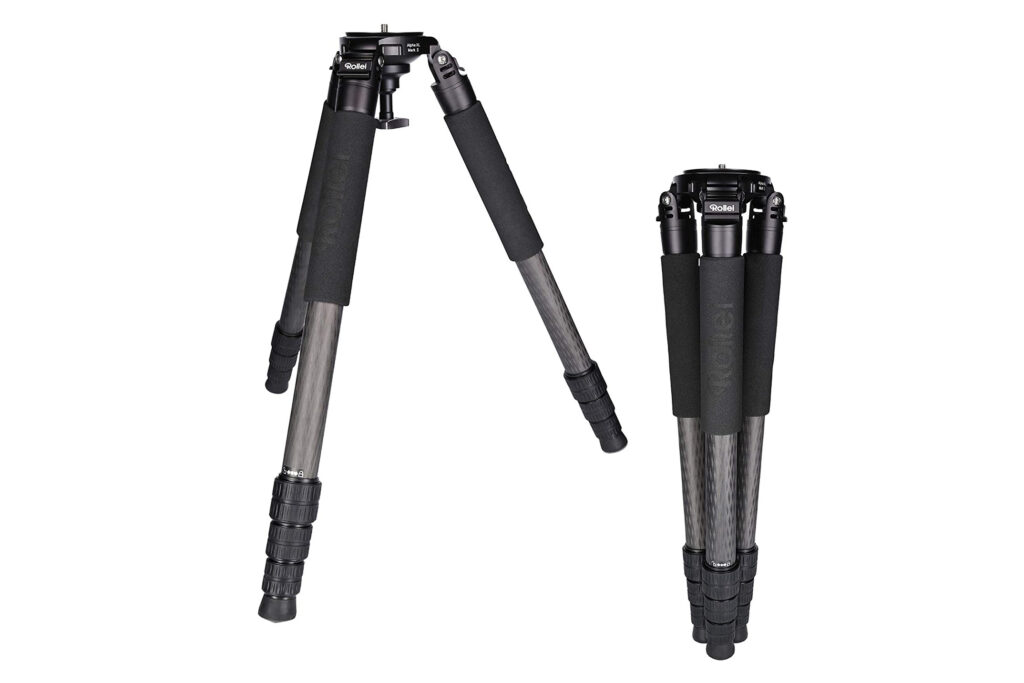
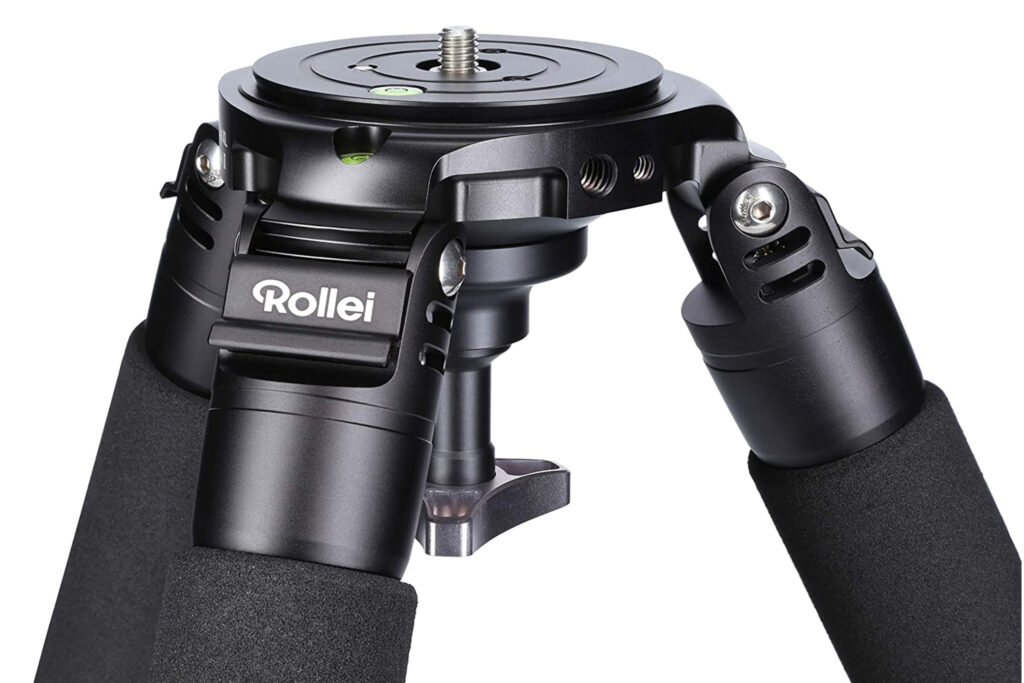
Shooting hand-held for any length of time is tiring and inevitably leads to camera shake and un-sharp images. And so for those reasons alone a sturdy tripod is a necessity as a wildlife photographer and even more so if you also intend to film and not just photograph wildlife. My tripod of choice is this one from Rollei.. Rollei Rock Solid Alpha XL Mark II Carbon Tripod, professional camera tripod with 65kg load capacity
At just over 3kg this is not a lightweight tripod but then again it has to be in order to carry heavy camera/lens combos securely, safely and with minimum wobble. It’s not cheap either but then again why would you entrust your $3k camera and $10k lens on a $100 tripod..?!
Apart from its massive 65kg load carrying capacity, other benefits of such a tripod are as follows:
- No matter whether in sand, salt water, extreme heat or freezing cold temperatures, the Rollei Rock Solid Alpha XL deals with it all;
- the included spikes and tripod leg plates allow a secure and stable stand on any surface;
- can extend to a height of 190cm;
- has no centre column and can therefore go as low as 14cm allowing us to achieve those low down eye-level intimate shots;
- utilizes a bowl head platform that can easily be levelled without the need to adjust the legs to achieve a level horizon.
This has to be one of the best and most favourite of my purchases and I can in all good conscience recommend it to you unequivocally..!
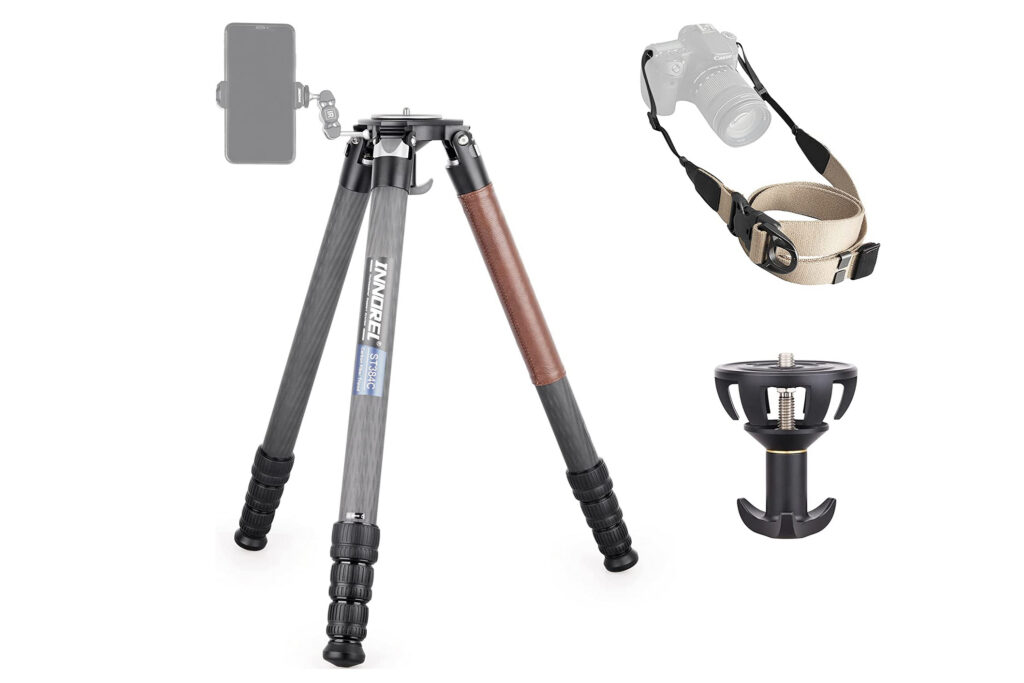
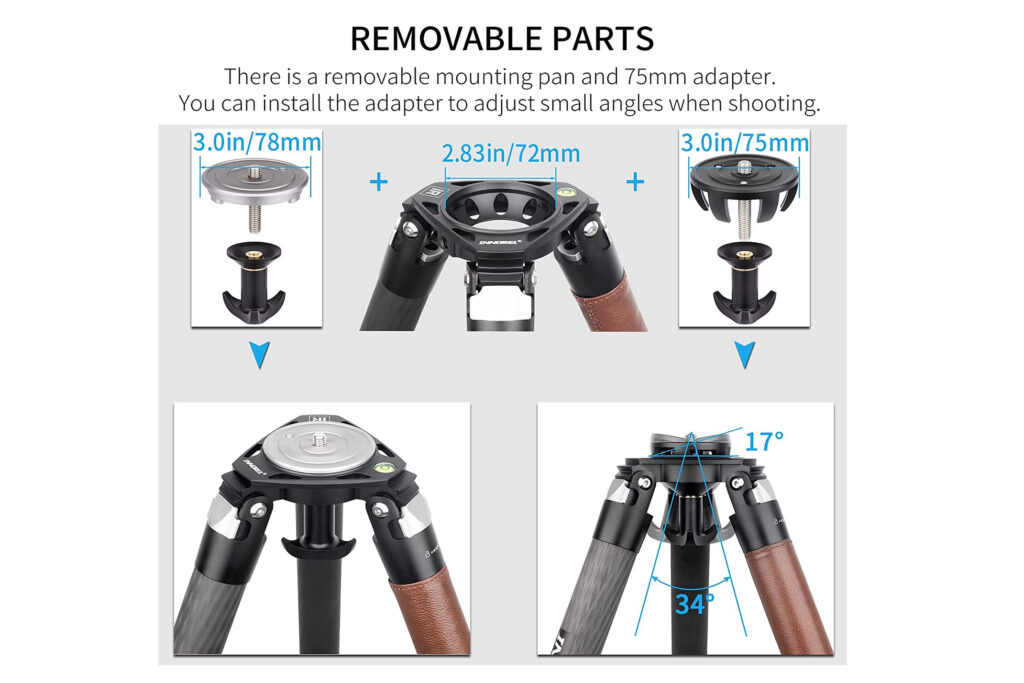
That being said the INNOREL ST384C Professional Heavy Duty Camera Stand with 75mm Bowl Adapter is a slightly less expensive tripod of similar style and specifications with a lower load capacity (still huge at 38kgs!) and lighter weight at just over 2kgs that looks like it would do the job perfectly well and has some very good reviews.
3. bean bag
As I mentioned above when talking tripods, stability is key when shooting with long telephoto lenses, especially if you are on a heavy 400mm, 500mm, 600mm or even longer prime and adding teleconverters as well for even more reach. Shooting hand-held for any length of time becomes quickly tiring and with that will suffer your stability and ability to capture a shot without camera shake.
Carrying a heavy duty tripod may not always be an option when heading out into nature and apart from the added weight to carry, you will face restrictions such as the speed in which you can set it up and be ready to shoot as well as difficulty in getting low angle shots to be at animal eye level if you have a tripod that doesn’t go down to ground level… and that’s where a bean bag comes into its own.
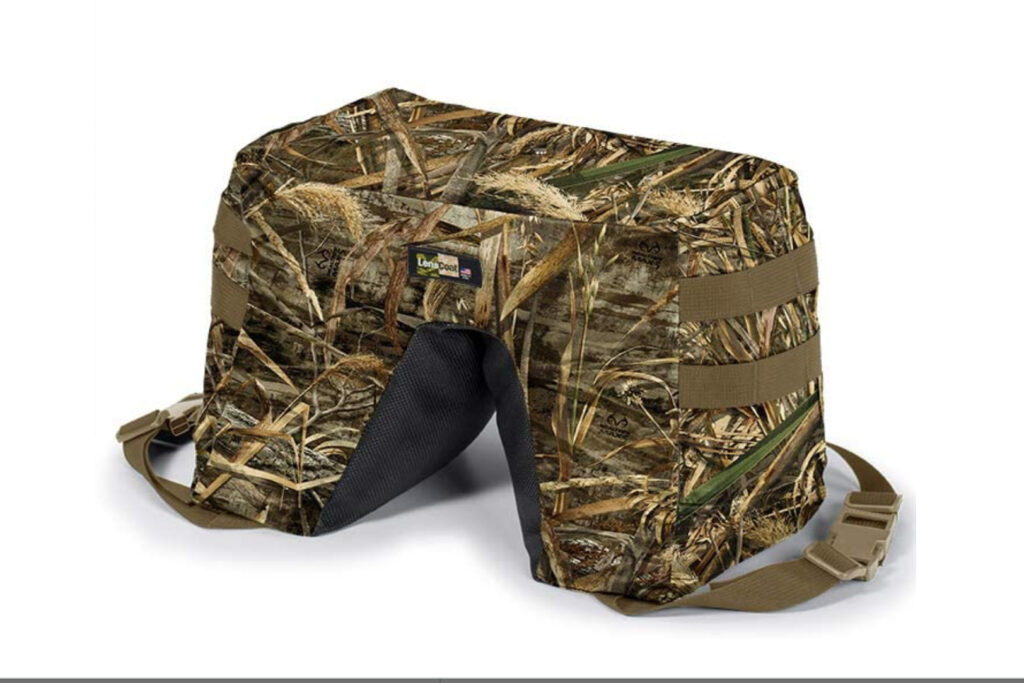
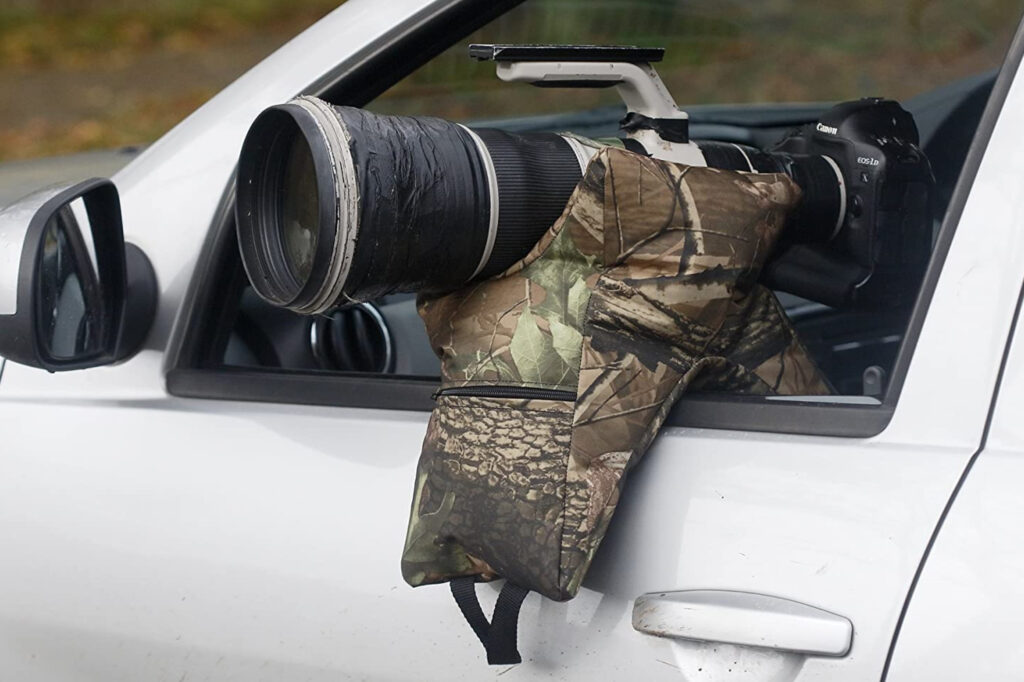
First and foremost it gives you a stable platform from which to shoot as well as somewhere to rest the camera when not shooting. It keeps your camera and lens above the dirt and damp, you can throw it down fast and be ready to shoot in seconds rather minutes as from a tripod and you can use it anywhere.. from the ground, a tree stump, railings, car doors, or from a safari vehicle. A ‘premium” bean bag such as this one from Lenscoat also has a removable lightweight aircraft-grade aluminum mounting plate with 3/8”-16 mounting screw for a gimbal or ball head. It also utilizes the M.O.L.L.E webbing system so as to easily be able to add pouches and accessories plus it has 2 storage pockets & 2 adjustable straps to secure and carry it.
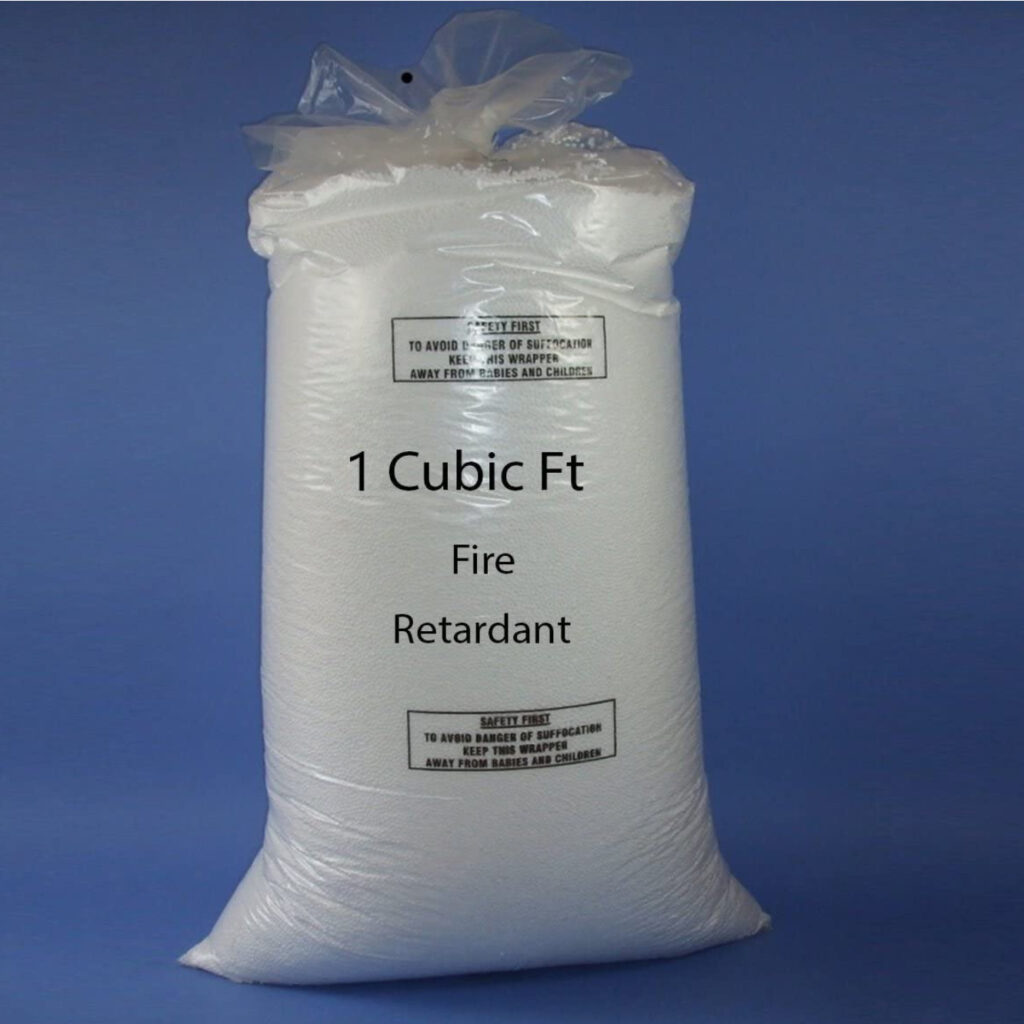
A note on filling: most bags will come empty leaving you to stuff with a filling of your choice. A handy tip I have found is not to fill the bag directly but to use something like plastic ziplock bags (or even my wife’s old stockings!!) which I fill and then insert. This allows me to have different types of filling for different uses. ie… if I’m heading out on foot for a day or more I want it light so I use bags filled with lightweight polystyrene balls. If I’m shooting from the car I want it heavy enough to sit solidly over the window so I use dry beans or sunflower seeds. It also means if I’m flying somewhere I can take out the inserts to travel with it empty, light and easy to pack and then find a filling when I arrive at my destination. Using inserts keeps the bag clean on the inside and also means you can switch out the filling to suit your purpose.
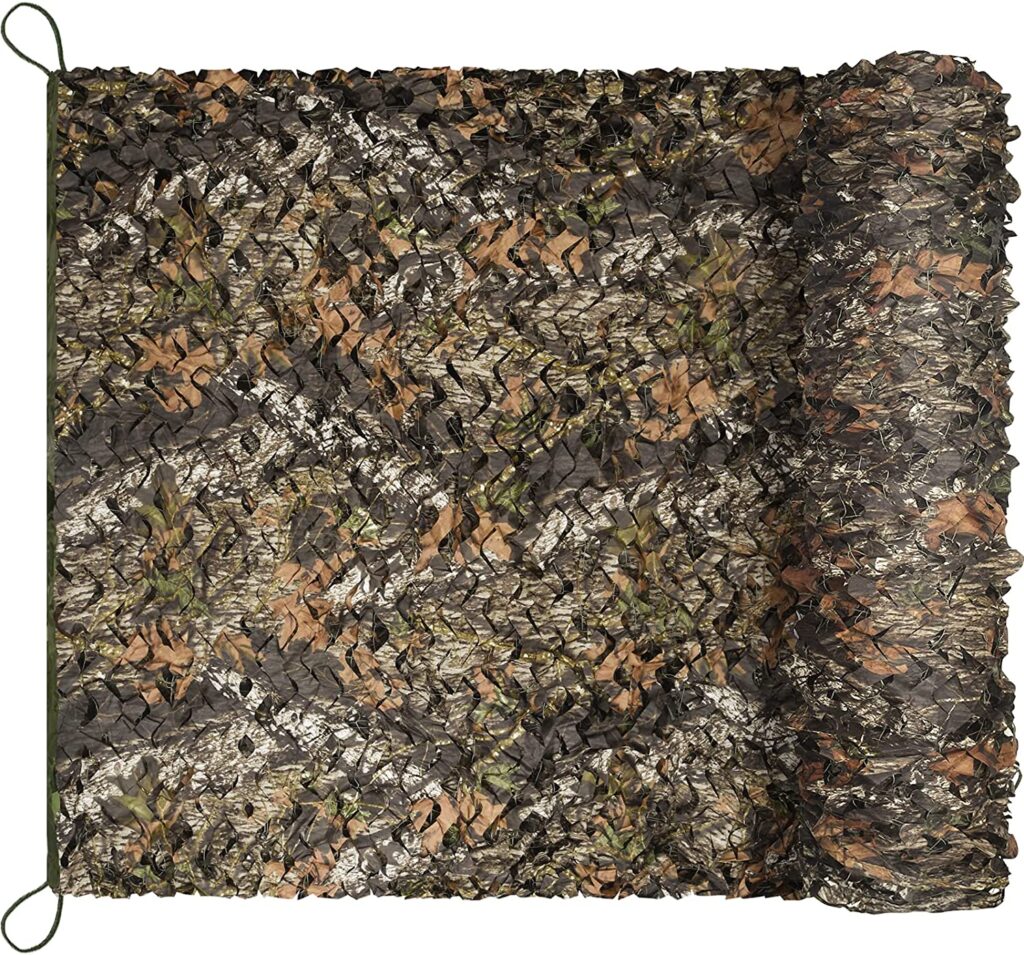
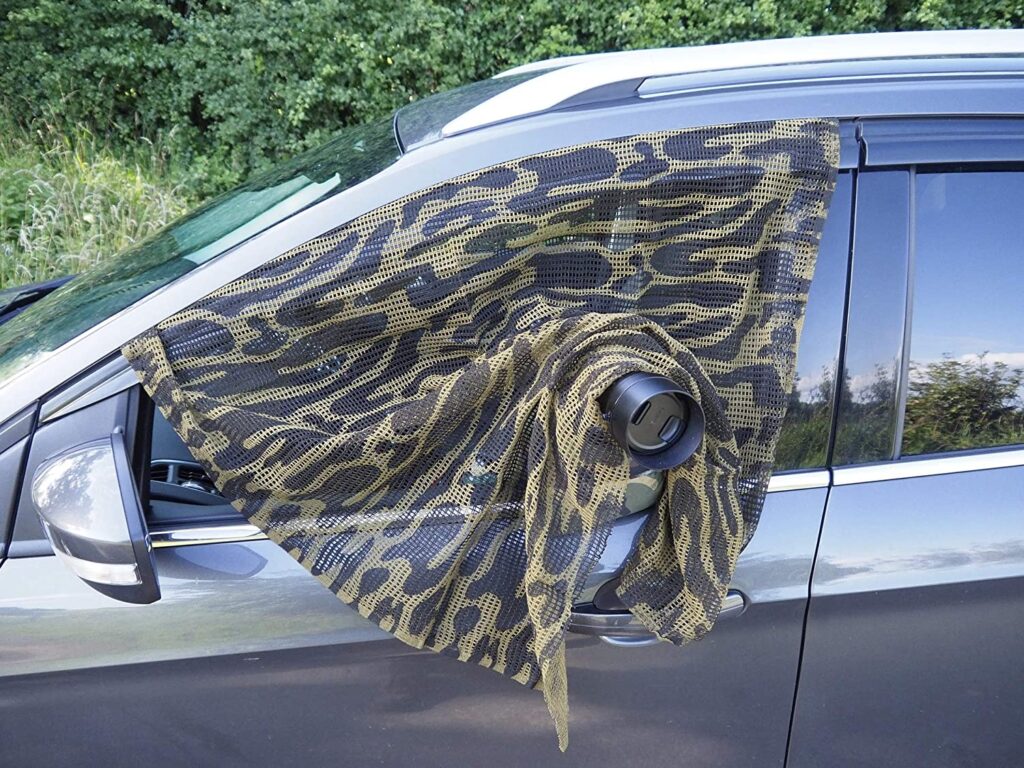
4. Camo Netting & SCRIM
When it comes to wildlife photography, in most instances concealment is a key factor, especially if you want to get close-up frame filling shots of your target species.
To that end there are various options available to us from high-end expensive hides all the way down to wearable “ghillie suits”… and whilst all have their place in our arsenals of kit, for me the most useful items are an easily packable and lightweight camo net and scrim.
With the camo net you can either throw it over the top of yourself and camera to encompass you and your camera entirely or you can hook it up to bushes and trees to create a more comfortable “blind” to sit behind and wait for your target species to wonder along. Whilst there is plenty of choice of netting to use for this purpose I would encourage you to find as ‘rustle-free” one as possible.
For the scrim I find it useful in a variety of different ways.. firstly it’s very quick and easy to throw over your camera/lens or over your head which in some instances can just be enough to break up your “human”” profile enough so as to not be immediately spotted by the animal you are stalking. I also like to use it when I’m using my car as a mobile hide.. I drape it over the window and again it provides enough concealment so as not to spook any animal you might be stalking and is a lot easier to handle for this purpose than a 3m wide piece of netting.
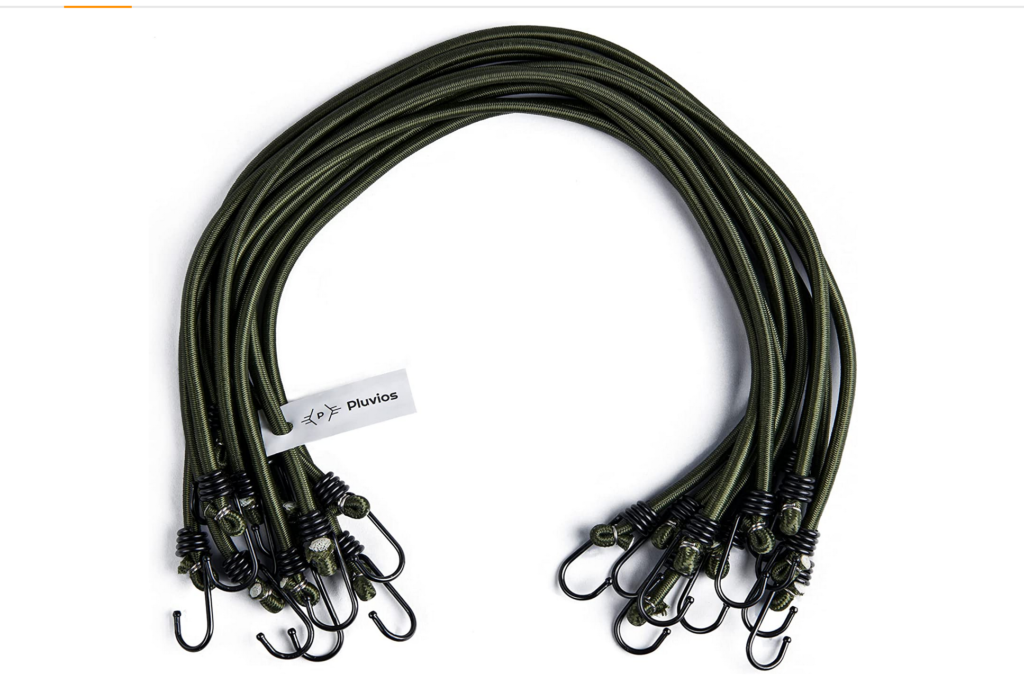
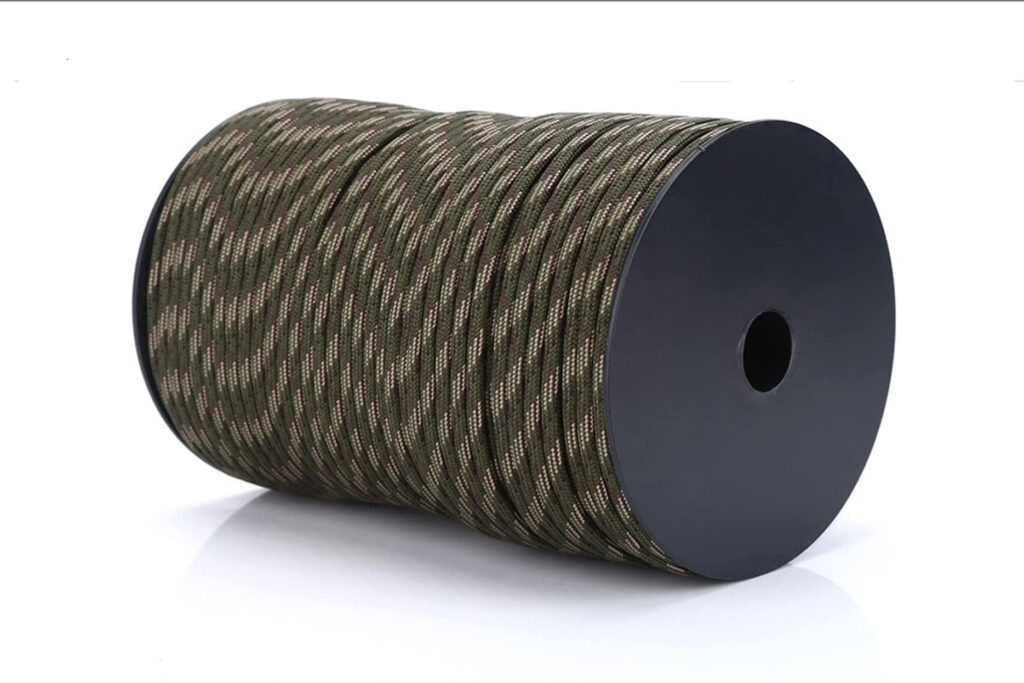
The netting I use is this one available in various sizes from Amazon and has the added benefit of corner loops for attaching to trees and bushes. A note on attaching.. there are a couple of ways I do this.. the first and by far the easiest is by using long bungee cords and the second is by tying off with paracord, which is good also but you’ll also have to deal with knots.!
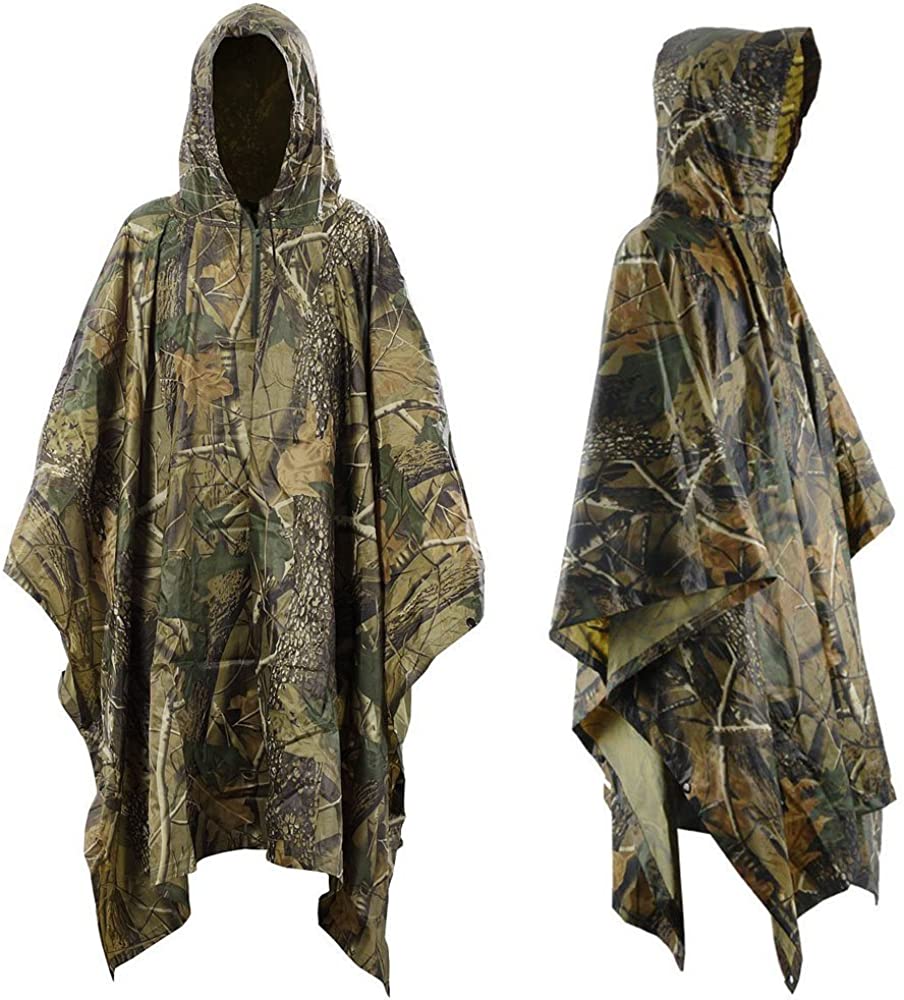
5. poncho
For me, throwing a poncho in my backpack on any trip into the wilderness has become a no-brainer and in fact my poncho now lives permanently in my backpack.
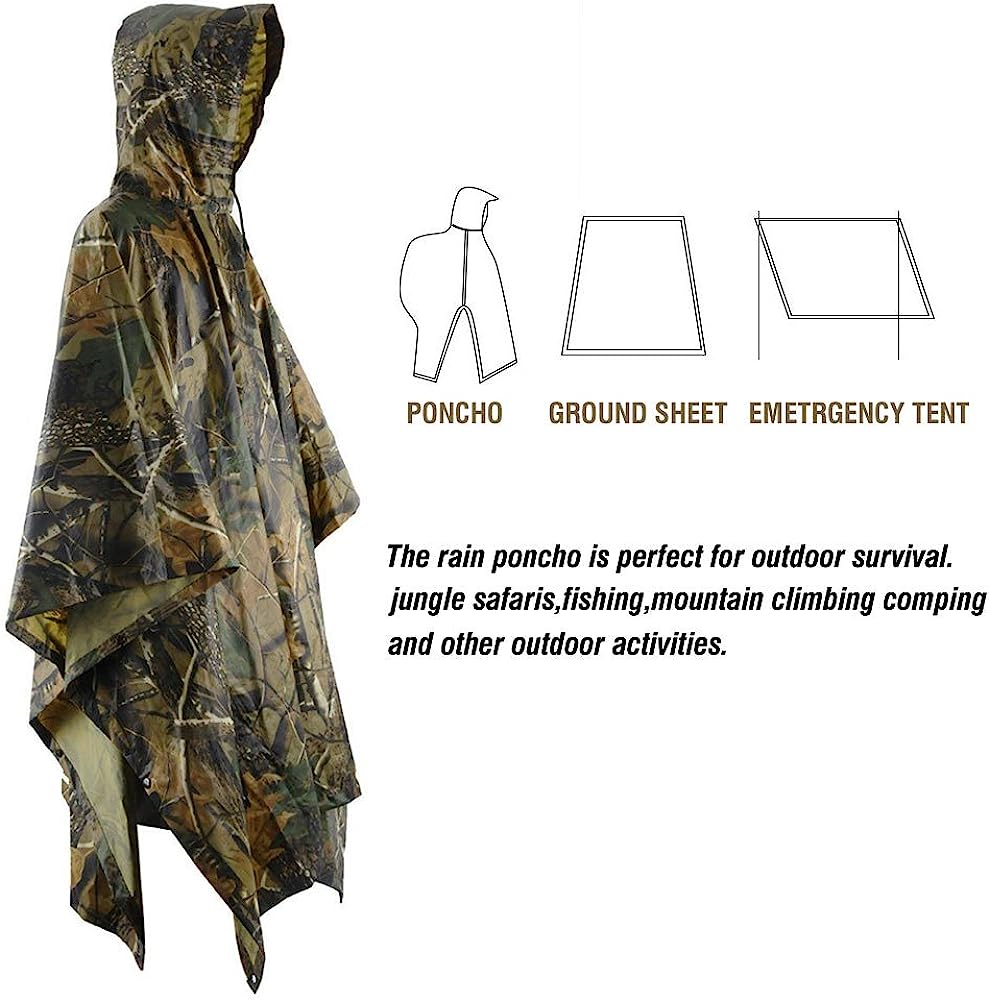
I have found this one to be good… Infreecs Waterproof Rain Poncho, but you can choose different ones though I suggest you ensure whichever you buy is firstly waterproof and secondly has grommets on the corners to be able to use as a shelter/tarp.
Use case.1… In and of itself you can use it as its design suggests to throw over yourself and your kit to provide protection from the elements.. it will cover you and your pack and your camera if necessary. It keeps yyou dry and the fact that it is basically open means it is also well ventilated and can be used for tropical downpours without over-heating.
Use case.2… Additionally I use it as a mobile, lightweight and waterproof hide/blind.. paired with scrim for better 3D concealment and bungee cords or paracord (see No2 above) for a super fast set-up.
Use case.3… Use as a groundsheet to keep your camera and kit from getting wet.
Use case.4… I have also used it in the past as an emergency shelter (for myself) and even as an emergency blanket when I came across someone on the mountain who needed help.
All-in-all.. an invaluable piece of kit..!
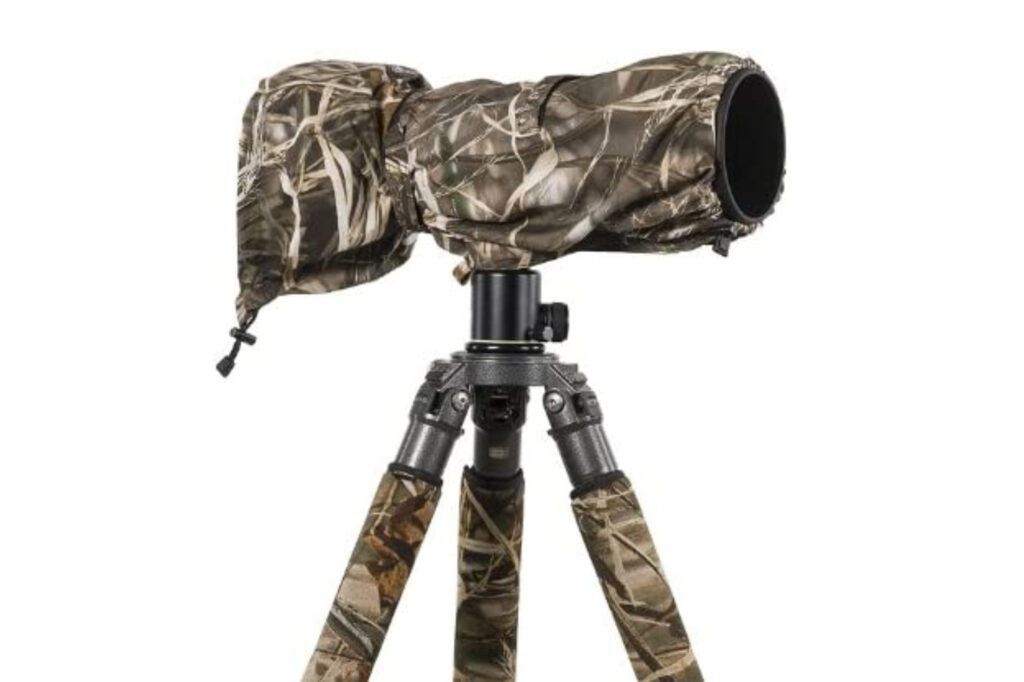
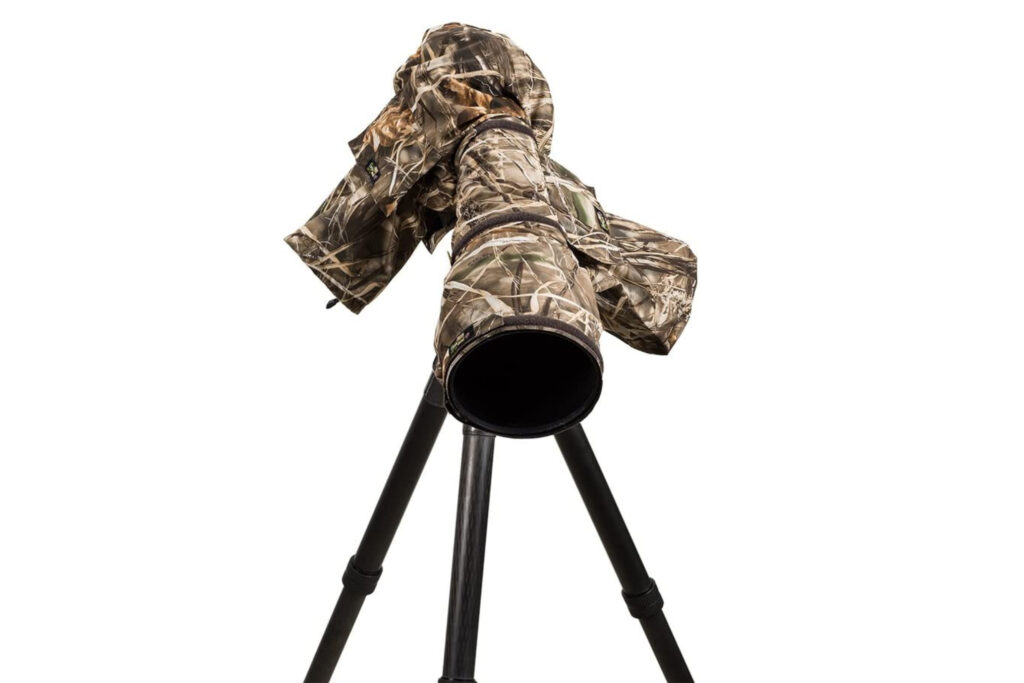
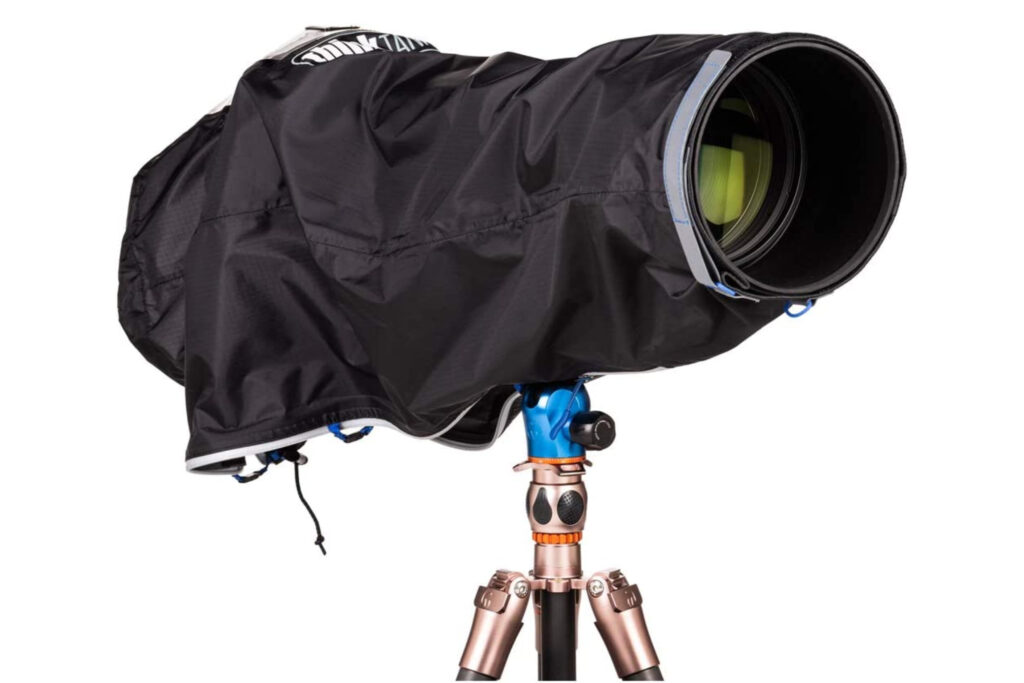
6. RAINCOVER
Whilst the majority of pro level cameras and lenses have pretty decent weather proofing, protecting your camera and lens from the elements is not a bad thing to do and allows you to be out in more extreme weather to get those dramatic shots you otherwise might think twice about venturing out to capture.
Using one of these covers, other than the obvious benefit of protecting your kit from rain has the following additional benefits:
- helps prevents camera & lens from freezing if shooting in arctic conditions
- helps prevent sand and grit getting in to your camera & lens if shooting in a desert or on a beach
- helps prevent salty sea spray from damaging your camera & lens if shooting from a boat
- can also protect your hands
My raincover of choice is this one from Vanguard.. it’s inexpensive, quick to fit in the event of a downpour and very effective… some alternates to this one are pictured and linked in the column to the right.—>
LensCoat Raincoat RS for Camera and Lens
LensCoat LCRC2PM4 RainCoat 2 Pro
Think Tank Photo Emergency Rain Cover
I hope this article has been of some help and given you a little insight into the kit I use and value and how it helps me do my job in the field and makes every excursion better, easier and safer.
Drop me a comment below with your thoughts and let me know what pieces of kit you value above all others in your pack.!
All the best
George
How to Improve your Cinematic Framing and Composition for Filming Wildlife
How do we frame a shot to make our story more interesting & more compelling.? How do we draw attention to our subject using composition? …
Making the leap from Photography to Videography – Frame Rates Explained for Photographers.
So many people showing me clips they had filmed on their lovely new mirrorless cameras were disappointed to see jumpy disjointed or laggy footage and could not understand why they were getting better slo-mo on their iPhones than their ££££’s cameras… allow me to explain…
Hello friends!
It’s been a looooong time coming, but, with the excuse now of a new website, my intention is to start posting more regularly on this Blog.